Revive an old Neufbox 6 with OpenWrt
While this article might only have interest for french people, you might want to get yourself an inexpensive Neufbox 6 on eBay or the like to play with it, thus the english language.
When I lived in France, my last Internet provider was SFR, it was (and still is) a fiber provider, and you got connected thanks to a box called the “Neufbox”. There were a couple of versions of this box that was pretty hackable and the provider was cool with it, you could even flash it with “opened” versions of their firmware, a modified OpenWrt.
At that time, there was an amazing website called OpenBox4 now closed and only browsable thanks to web archive (donate to them!), that gave all the informations needed to take control of your Neufbox. But as it is closed now, I’ll try to put the needed pieces here in order to revive this great router with a brand new OpenWrt 19.07.
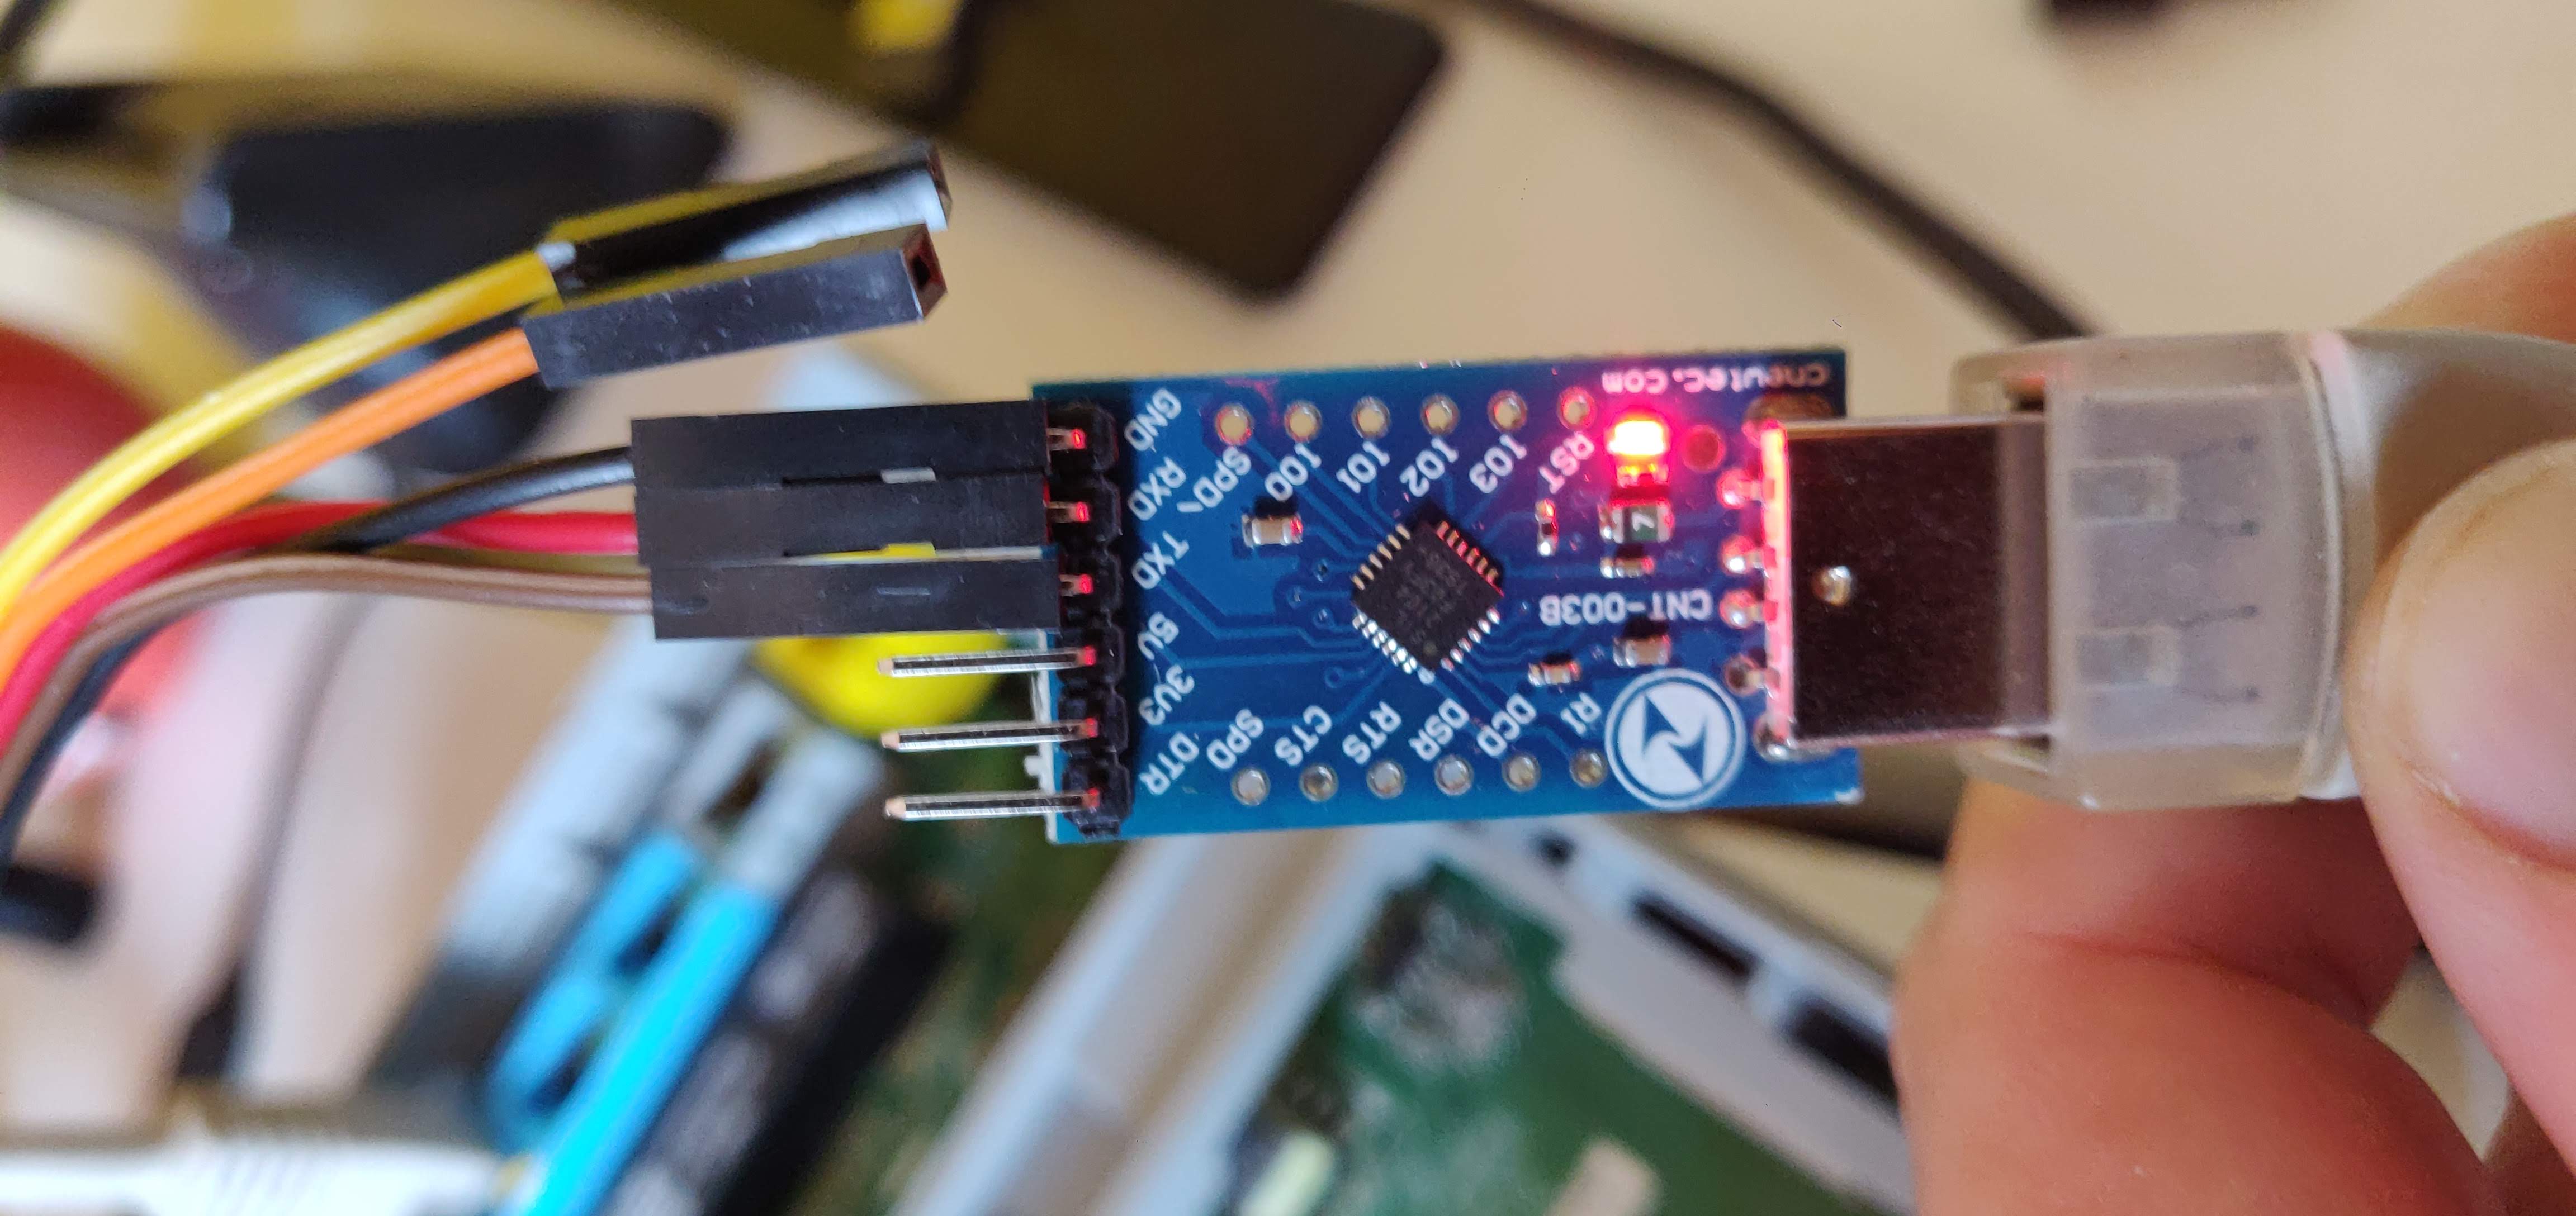
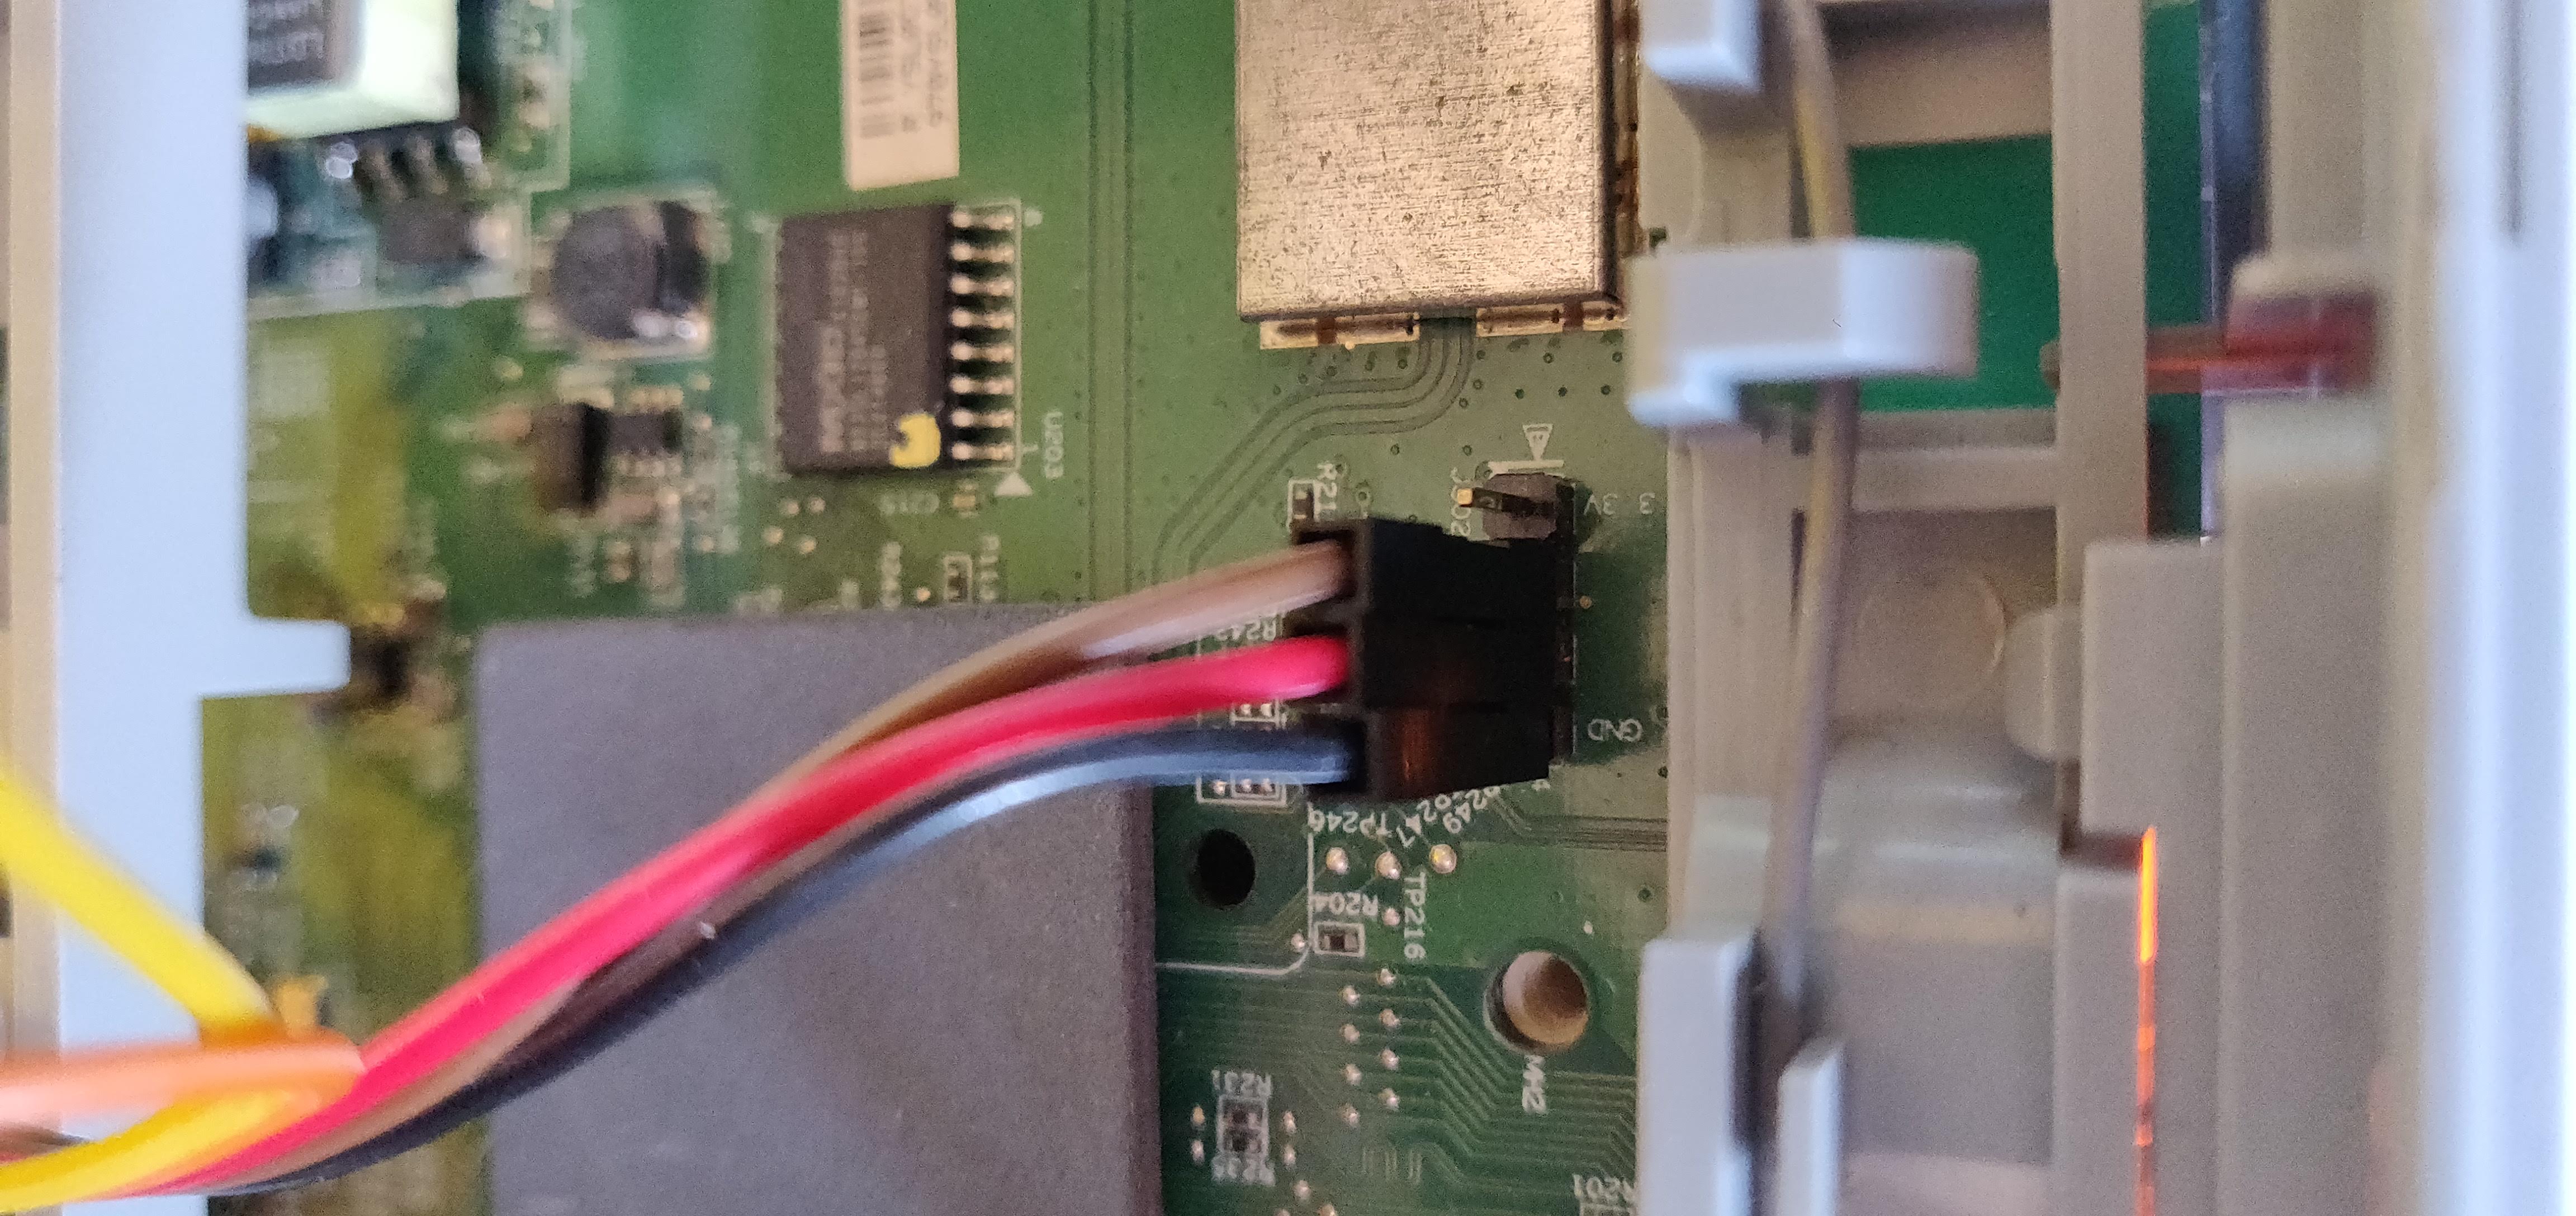
First, talking about the hardware, in order to easily flash and / or rescue your Neufbox 6 you’ll need an USB / TTL UART converter so you’ll be able to plug into and use the box’s serial console. I bought this CP2104 converter on Amazon at 7€ just because I’m an impatient type of person but you could get yourself a cheaper one on eBay.
As shown in the following photos, you’ll have to plug CP2104 GND, TX and RX to the Neubox 6 serial port in that order, from left to right, GND being the pin closest to the screw. The last and empty pin is VCC at 3.3V, do not plug it.
In order to check the serial console, verify that your system sees the UART, i.e.
$ dmesg|grep -i cp21
[912189.989801] usb 1-10.2: Product: CP2104 USB to UART Bridge Controller
[912189.992248] cp210x 1-10.2:1.0: cp210x converter detected
[912189.993780] usb 1-10.2: cp210x converter now attached to ttyUSB0
Once the USB serial converter have been connected to the NB6, launch your favorite serial terminal in 115200 8N1 serial mode, for example with GNU screen:
$ sudo screen /dev/ttyUSB0 115200
Power on the NB6 and you should see it booting!
HELO
CPUI
L1CI
HELO
CPUI
L1CI
DRAM
----
PHYS
ZQDN
PHYE
DINT
LASY
USYN
MSYN
LMBE
PASS
----
ZBSS
CODE
DATA
L12F
MAIN


CFE version 1.0.37-106.5 for BCM96362 (32bit,SP,BE)
Build Date: mar. sept.  7 17:10:14 CEST 2010 (arno@golgoth13)
Copyright (C) 2000-2009 Broadcom Corporation.

boot...
Good, now you might shut it down as we won’t be using NB6’s original firmware anyway.
Next step is to prepare a tftp server somewhere on your network that the NB6 will be able to reach. My tftp server runs on a FreeBSD machine, I’ve only added:
inetd_enable="YES"
to /etc/rc.conf, uncommented:
tftp dgram udp wait root /usr/libexec/tftpd tftpd -l -s /tftpboot
in /etc/inetd.conf, created a /tftpboot directory, started inetd:
$ sudo /etc/rc.d/inetd start
and placed NEUFBOX6-squashfs-cfe.bin into /tftpboot.
Now it’s time to boot the NB6 in a way it stops at the CFE bootloader. To achieve this, press a key when the following message appears:
*** Press any key to stop auto run (1 second) ***
Here you will probably want to change the parameters, you can do this by typing c (Change booline parameters):
CFE> c
Press:  <enter> to use current value
        '-' to go previous parameter
        '.' to clear the current value
        'x' to exit this command
Board IP address                     :  192.168.7.90:ffffff00
Host IP address                      :  192.168.7.254
Gateway IP address                   :  192.168.7.254
Run from flash/host (f/h)            :  f
Default host run file name           :  vmlinux
Default host flash file name         :  bcm963xx_fs_kernel
Boot delay (0-9 seconds)             :  5
*** command status = 0
- Board IP address is the actual NB6
- Host IP address is the
tftpserver
By default the boot delay is set to 1 sec, you might want to raise it.
It is now time to fetch and write the desired OpenWrt image, this is done using the following syntax on the CFE:
CFE> f 192.168.7.254:openwrt-19.07.0-brcm63xx-generic-NEUFBOX6-squashfs-cfe.bin
Note that there’s a second, more automated method in order to trigger the download / flash. It consists on setting up a DHCP server on the tftp server and launch the NB6 in download mode. This is done by pressing the SFR front button while powering on the box, and keep pressing it for about 8 seconds, until the led turns red.
In order for this method to work, the DHCP server should be able to respond using the default network and IP the CFE is configured with, i.e.:
Board IP address                     : 192.168.22.22:ffffff00
Host IP address                      : 192.168.22.68
The DHCP server configuration would look like this:
host 9box {
  hardware ethernet 00:25:15:fe:46:7f;
  fixed-address 192.168.22.22;
  next-server myserver;
  filename "/openwrt-19.07.0-brcm63xx-generic-NEUFBOX6-squashfs-cfe.bin";
}
Your brand new flashed Neufbox 6 should have booted using OpenWrt 19.07, simply press enter on the screen terminal:
BusyBox v1.30.1 () built-in shell (ash)

  _______                     ________        __
 |       |.-----.-----.-----.|  |  |  |.----.|  |_
 |   -   ||  _  |  -__|     ||  |  |  ||   _||   _|
 |_______||   __|_____|__|__||________||__|  |____|
          |__| W I R E L E S S   F R E E D O M
 -----------------------------------------------------
 OpenWrt 19.07.0, r10860-a3ffeb413b
 -----------------------------------------------------
=== WARNING! =====================================
There is no root password defined on this device!
Use the "passwd" command to set up a new password
in order to prevent unauthorized SSH logins.
--------------------------------------------------
root@OpenWrt:/#
It is to be noted that the embedded b43 based WiFi adapter is not recognized, nevertheless, you probably noticed there was an USB port available on the box, good news is this port is perfectly functional and an USB WiFi dongle can be inserted, we only have to fetch the kernel module and maybe needed firmware using OpenWrt package manager opkg.
Let’s first setup the network in /etc/config/network. We will simply use DHCP here:
config interface 'lan'
        option type 'bridge'
        option ifname 'eth0.1'
        option proto 'dhcp'
This interface correspond to the blue RJ45 adapters.
Let’s reload the network:
root@OpenWrt:/# service network reload
And you should now have a br-lan interface up and running:
7: br-lan: <BROADCAST,MULTICAST,UP,LOWER_UP> mtu 1500 qdisc noqueue state UP qlen 1000
    link/ether 00:25:15:ee:56:a0 brd ff:ff:ff:ff:ff:ff
    inet 192.168.7.90/24 brd 192.168.7.255 scope global br-lan
       valid_lft forever preferred_lft forever
    inet6 fe80::225:15ff:feee:56a0/64 scope link
       valid_lft forever preferred_lft forever
8: eth0.1@eth0: <BROADCAST,MULTICAST,UP,LOWER_UP> mtu 1500 qdisc noqueue master br-lan state UP qlen 1000
    link/ether 00:25:15:ee:56:a0 brd ff:ff:ff:ff:ff:ff
root@OpenWrt:/# ping -c 1 1.1
PING 1.1 (1.0.0.1): 56 data bytes
64 bytes from 1.0.0.1: seq=0 ttl=56 time=47.902 ms

--- 1.1 ping statistics ---
1 packets transmitted, 1 packets received, 0% packet loss
round-trip min/avg/max = 47.902/47.902/47.902 ms
You can now fetch the packages database using opkg update.
My USB WiFi dongle is a RTL8192EU based TP-LINK. The associated module package is kmod-rtl8xxxu, let’s install it:
root@OpenWrt:/# opkg install kmod-rtl8xxxu
As we can see, this module needs a firmware that’s not present on the system:
[ 1493.163649] usb 1-2: rtl8xxxu: Loading firmware rtlwifi/rtl8192eu_nic.bin
[ 1493.170800] usb 1-2: Direct firmware load for rtlwifi/rtl8192eu_nic.bin failed with error -2
[ 1493.179469] usb 1-2: Falling back to user helper
[ 1493.386687] firmware rtlwifi!rtl8192eu_nic.bin: firmware_loading_store: map pages failed
[ 1493.398014] usb 1-2: request_firmware(rtlwifi/rtl8192eu_nic.bin) failed
[ 1493.404844] usb 1-2: Fatal - failed to load firmware
Download it:
root@OpenWrt:/# opkg install rtl8192eu-firmware
Installing rtl8192eu-firmware (20190416-1) to root...
Downloading http://downloads.openwrt.org/releases/19.07.0/packages/mips_mips32/base/rtl8192eu-firmware_20190416-1_mips_mips32.ipk
Configuring rtl8192eu-firmware.
And after unplugging / replugging the dongle:
root@OpenWrt:/# ifconfig wlan0
wlan0     Link encap:Ethernet  HWaddr 50:3E:AA:9A:F4:00
          BROADCAST MULTICAST  MTU:1500  Metric:1
          RX packets:0 errors:0 dropped:0 overruns:0 frame:0
          TX packets:0 errors:0 dropped:0 overruns:0 carrier:0
          collisions:0 txqueuelen:1000
          RX bytes:0 (0.0 B)  TX bytes:0 (0.0 B)
There we go, a shiny new wireless router running OpenWrt ready to serve!
Here are a list of resources that helped me writing this article
- https://openwrt.org/toh/hwdata/sfr/sfr_neufbox6
- http://web.archive.org/web/20180823072417/https://www.neufbox4.org/wiki/index.php?title=Neufbox_6 (this is a web archive link, it might disappear)
- http://web.archive.org/web/20170815150432/https://www.neufbox4.org/wiki/index.php?title=Tuto_Rapido_NB6 (ditto)
- http://web.archive.org/web/20140802140617/http://www.neufbox4.org/wiki/index.php?title=Flasher_une_NB6 (ditto)
- https://wikidevi.wi-cat.ru/SFR_Neufbox_6